01c - Enable Karbon Airgap
Setelah kita enable Nutanix Kubernetes Engine (NKE) component, kemudian kita update NKE menjadi v2.8.0 atau yang terbaru. Kita perlu mengatifkan Karbon Airgap supaya proses pembuatan cluster bisa berjalan offline dan prosesnya lebih cepet. Berikut adalah step-by-step untuk mengaktifkan Karbon Airgap:
- Deploy webserver sebagai Darksite
- Download & Upload Karbon Airgap resources ke darksite
- Deploy Karbon airgap
Deploy webserver sebagai Darksite
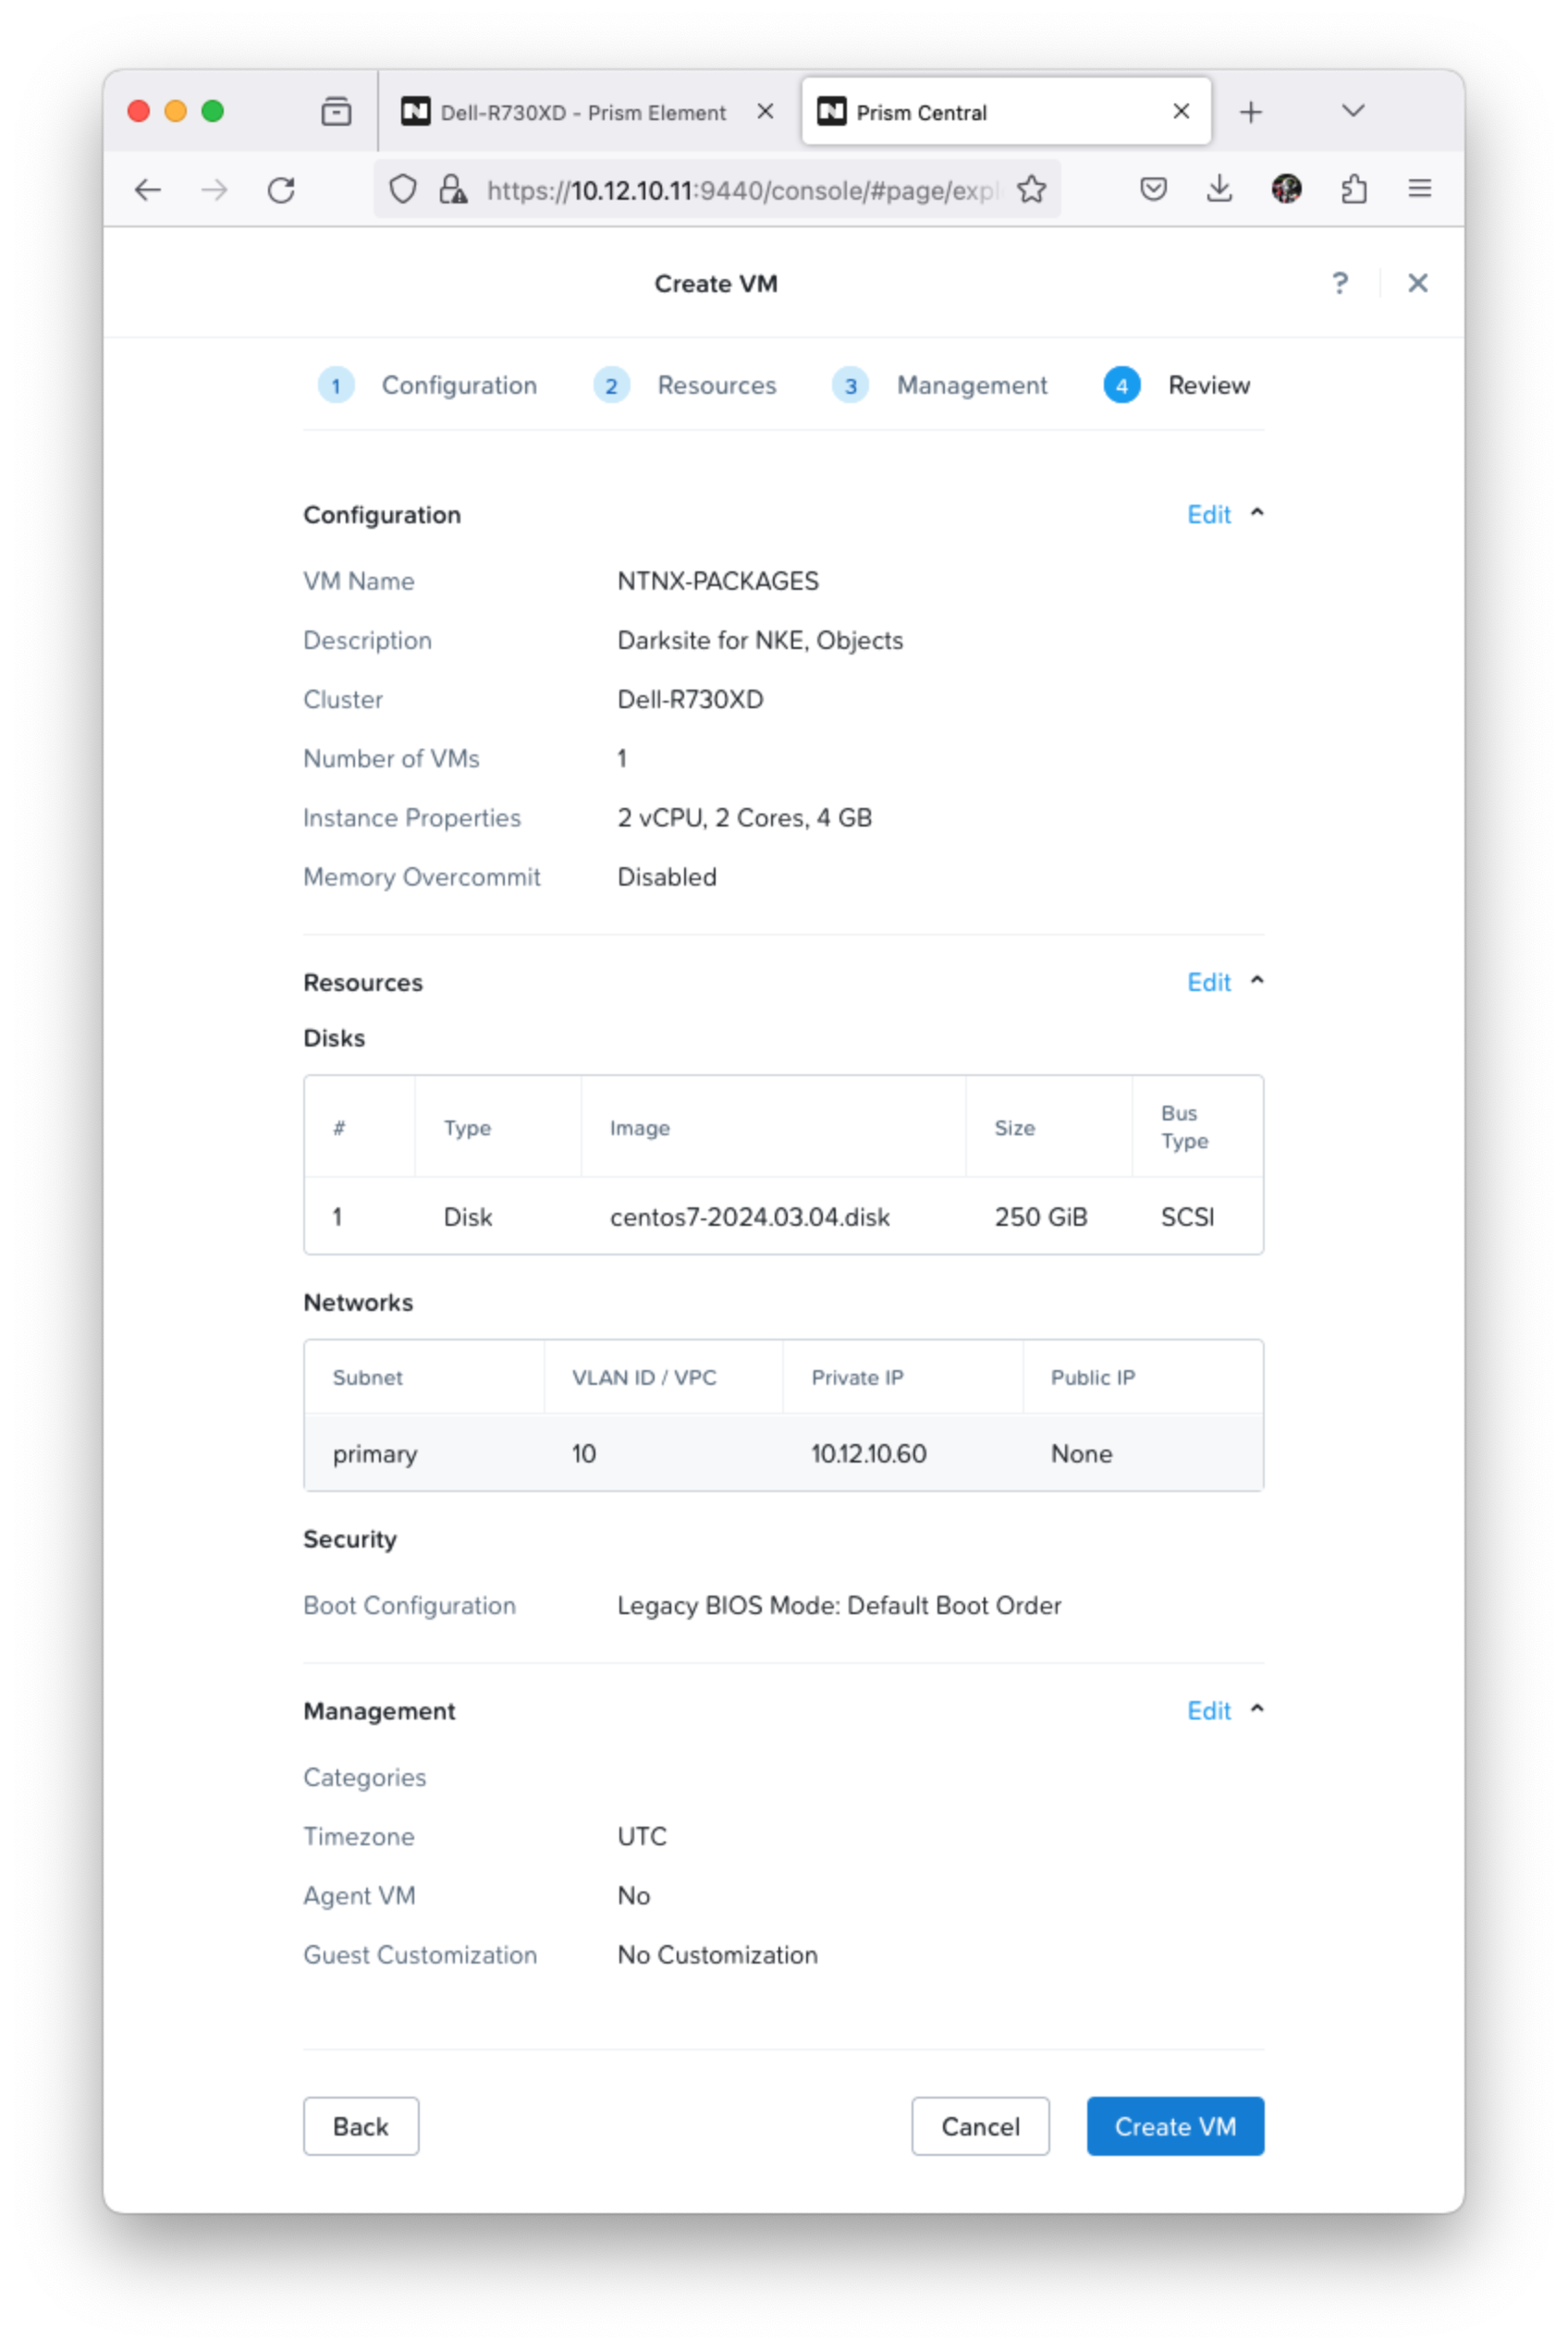
Untuk membuat web-server sebagai Darksite untuk menyimpan nutanix packages, berikut adalah specifikasi yang dibutuhakan:
name: NTNX-PACKAGES
description: Darksite for NKE, Objects
resources:
    CPUs: 2
    CoresPerCPU: 2
    Memory: 4
disks:
    - type: Disk
      operation: Clone from Image
      image: centos7-2207-2.disk # select vm template we created before
      capacity: 250 GiB
      busType: SCSI
networks:
    subnet: Primary
    assignmentType: Assign Static IP
    ipAddress: 10.xx.xx.60
bootConfiguration:
    mode: Legacy BIOS Mode
    bootPriority: Default
Jadi seperti berikut:
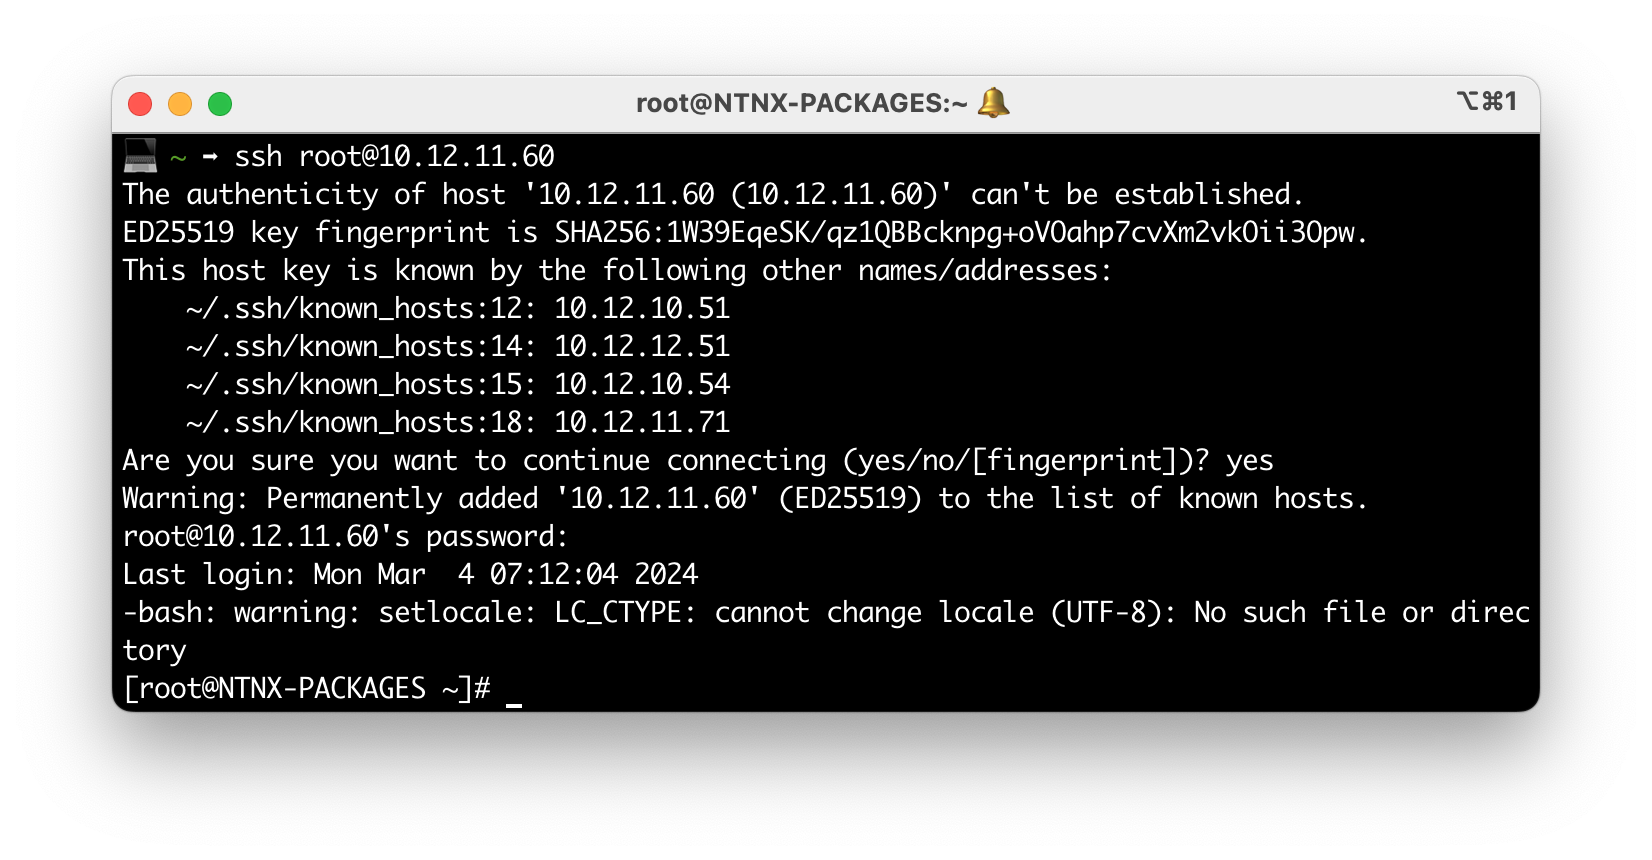
Kemudian coba nyalakan vm tersebut, dan login menggunakan user: root pass: passwordnyaAdmin seperti berikut:
Kemudian kita update disknya, karena kita buat virtual disk 250 GiB tetapi secara logical masih default image yaitu 50 GiB seperti berikut:
[root@NTNX-PACKAGES ~]# df -h | grep \root
/dev/mapper/centos-root   46G  1.7G   44G   4% /
Maka kita harus update lvm disknya dengan menggunakan perintah berikut:
[root@NTNX-PACKAGES ~]# fdisk -l

Disk /dev/sda: 268.4 GB, 268435456000 bytes, 524288000 sectors
Units = sectors of 1 * 512 = 512 bytes
Sector size (logical/physical): 512 bytes / 4096 bytes
I/O size (minimum/optimal): 4096 bytes / 1048576 bytes
Disk label type: dos
Disk identifier: 0x000c0828

   Device Boot      Start         End      Blocks   Id  System
/dev/sda1   *        2048     2099199     1048576   83  Linux
/dev/sda2         2099200   104857599    51379200   8e  Linux LVM

Disk /dev/mapper/centos-root: 48.4 GB, 48444211200 bytes, 94617600 sectors
Units = sectors of 1 * 512 = 512 bytes
Sector size (logical/physical): 512 bytes / 4096 bytes
I/O size (minimum/optimal): 4096 bytes / 1048576 bytes


Disk /dev/mapper/centos-swap: 4160 MB, 4160749568 bytes, 8126464 sectors
Units = sectors of 1 * 512 = 512 bytes
Sector size (logical/physical): 512 bytes / 4096 bytes
I/O size (minimum/optimal): 4096 bytes / 1048576 bytes

## Set new partision disk
[root@NTNX-PACKAGES ~]# fdisk /dev/sda

The device presents a logical sector size that is smaller than
the physical sector size. Aligning to a physical sector (or optimal
I/O) size boundary is recommended, or performance may be impacted.
Welcome to fdisk (util-linux 2.23.2).

Changes will remain in memory only, until you decide to write them.
Be careful before using the write command.


Command (m for help): n # type n for new partision
Partition type:
   p   primary (2 primary, 0 extended, 2 free)
   e   extended
Select (default p): p # type p for primary
Partition number (3,4, default 3): # hit enter for default value
First sector (104857600-524287999, default 104857600): # hit enter for default value
Using default value 104857600
Last sector, +sectors or +size{K,M,G} (104857600-524287999, default 524287999):
Using default value 524287999
Partition 3 of type Linux and of size 200 GiB is set

Command (m for help): w # type w for write disk
The partition table has been altered!

## restart vm, to apply changes disk partision
[root@NTNX-PACKAGES ~]# reboot
Connection to 10.12.11.60 closed by remote host.
Connection to 10.12.11.60 closed.

## login back
ssh root@10.12.11.60                                                         255
root@10.12.11.60 password: # enter root password
[root@NTNX-PACKAGES ~]#

## create pvc
[root@nke-ops-nexus-oss ~]# pvcreate /dev/sda3
  Physical volume "/dev/sda3" successfully created.

## create vg
[root@nke-ops-nexus-oss ~]# vgcreate centos_ext /dev/sda3
  Volume group "centos_ext" successfully created

## check list vg
[root@nke-ops-nexus-oss ~]# vgs
  VG         #PV #LV #SN Attr   VSize    VFree
  centos       1   2   0 wz--n-  <49.00g    4.00m
  centos_ext   1   0   0 wz--n- <200.00g <200.00g

## merge new vg into the existing one
[root@NTNX-PACKAGES ~]# vgmerge centos centos_ext
  Volume group "centos_ext" successfully merged into "centos"

## extend logical volume
[root@NTNX-PACKAGES ~]# lvextend -l 100%FREE /dev/mapper/centos-root
  Size of logical volume centos/root changed from <45.12 GiB (11550 extents) to 200.00 GiB (51200 extents).
  Logical volume centos/root successfully resized.

## apply logical volume
[root@NTNX-PACKAGES ~]# xfs_growfs /dev/mapper/centos-root
meta-data=/dev/mapper/centos-root isize=512    agcount=4, agsize=2956800 blks
         =                       sectsz=4096  attr=2, projid32bit=1
         =                       crc=1        finobt=0 spinodes=0
data     =                       bsize=4096   blocks=11827200, imaxpct=25
         =                       sunit=0      swidth=0 blks
naming   =version 2              bsize=4096   ascii-ci=0 ftype=1
log      =internal               bsize=4096   blocks=5775, version=2
         =                       sectsz=4096  sunit=1 blks, lazy-count=1
realtime =none                   extsz=4096   blocks=0, rtextents=0
data blocks changed from 11827200 to 52428800

## check disk
[root@NTNX-PACKAGES ~]# df -h | grep \root
/dev/mapper/centos-root  200G  1.7G  199G   1% /
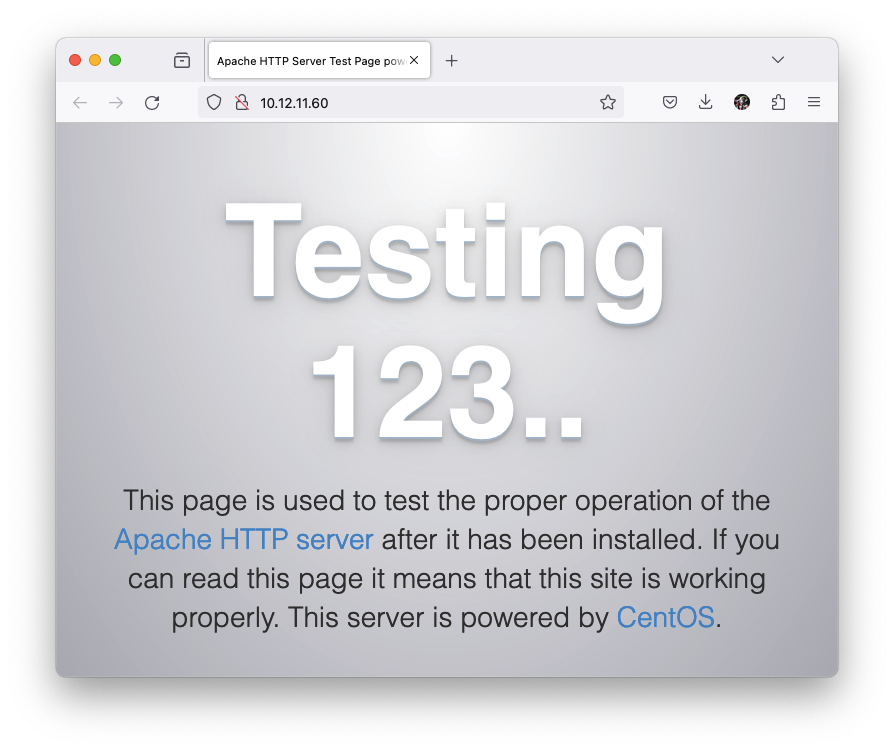
Setelah kita update logical disk menjadi 250 GiB sekarang kita install web-server menggunakan httpd dengan perintah berikut:
yum update && \
yum install -y httpd && \
systemctl enable --now httpd && \
firewall-cmd --zone=public --add-port=80/tcp --add-port=443/tcp --permanent && \
firewall-cmd --reload
Maka hasilnya seperti berikut:
Download & Upload Karbon Airgap binaries
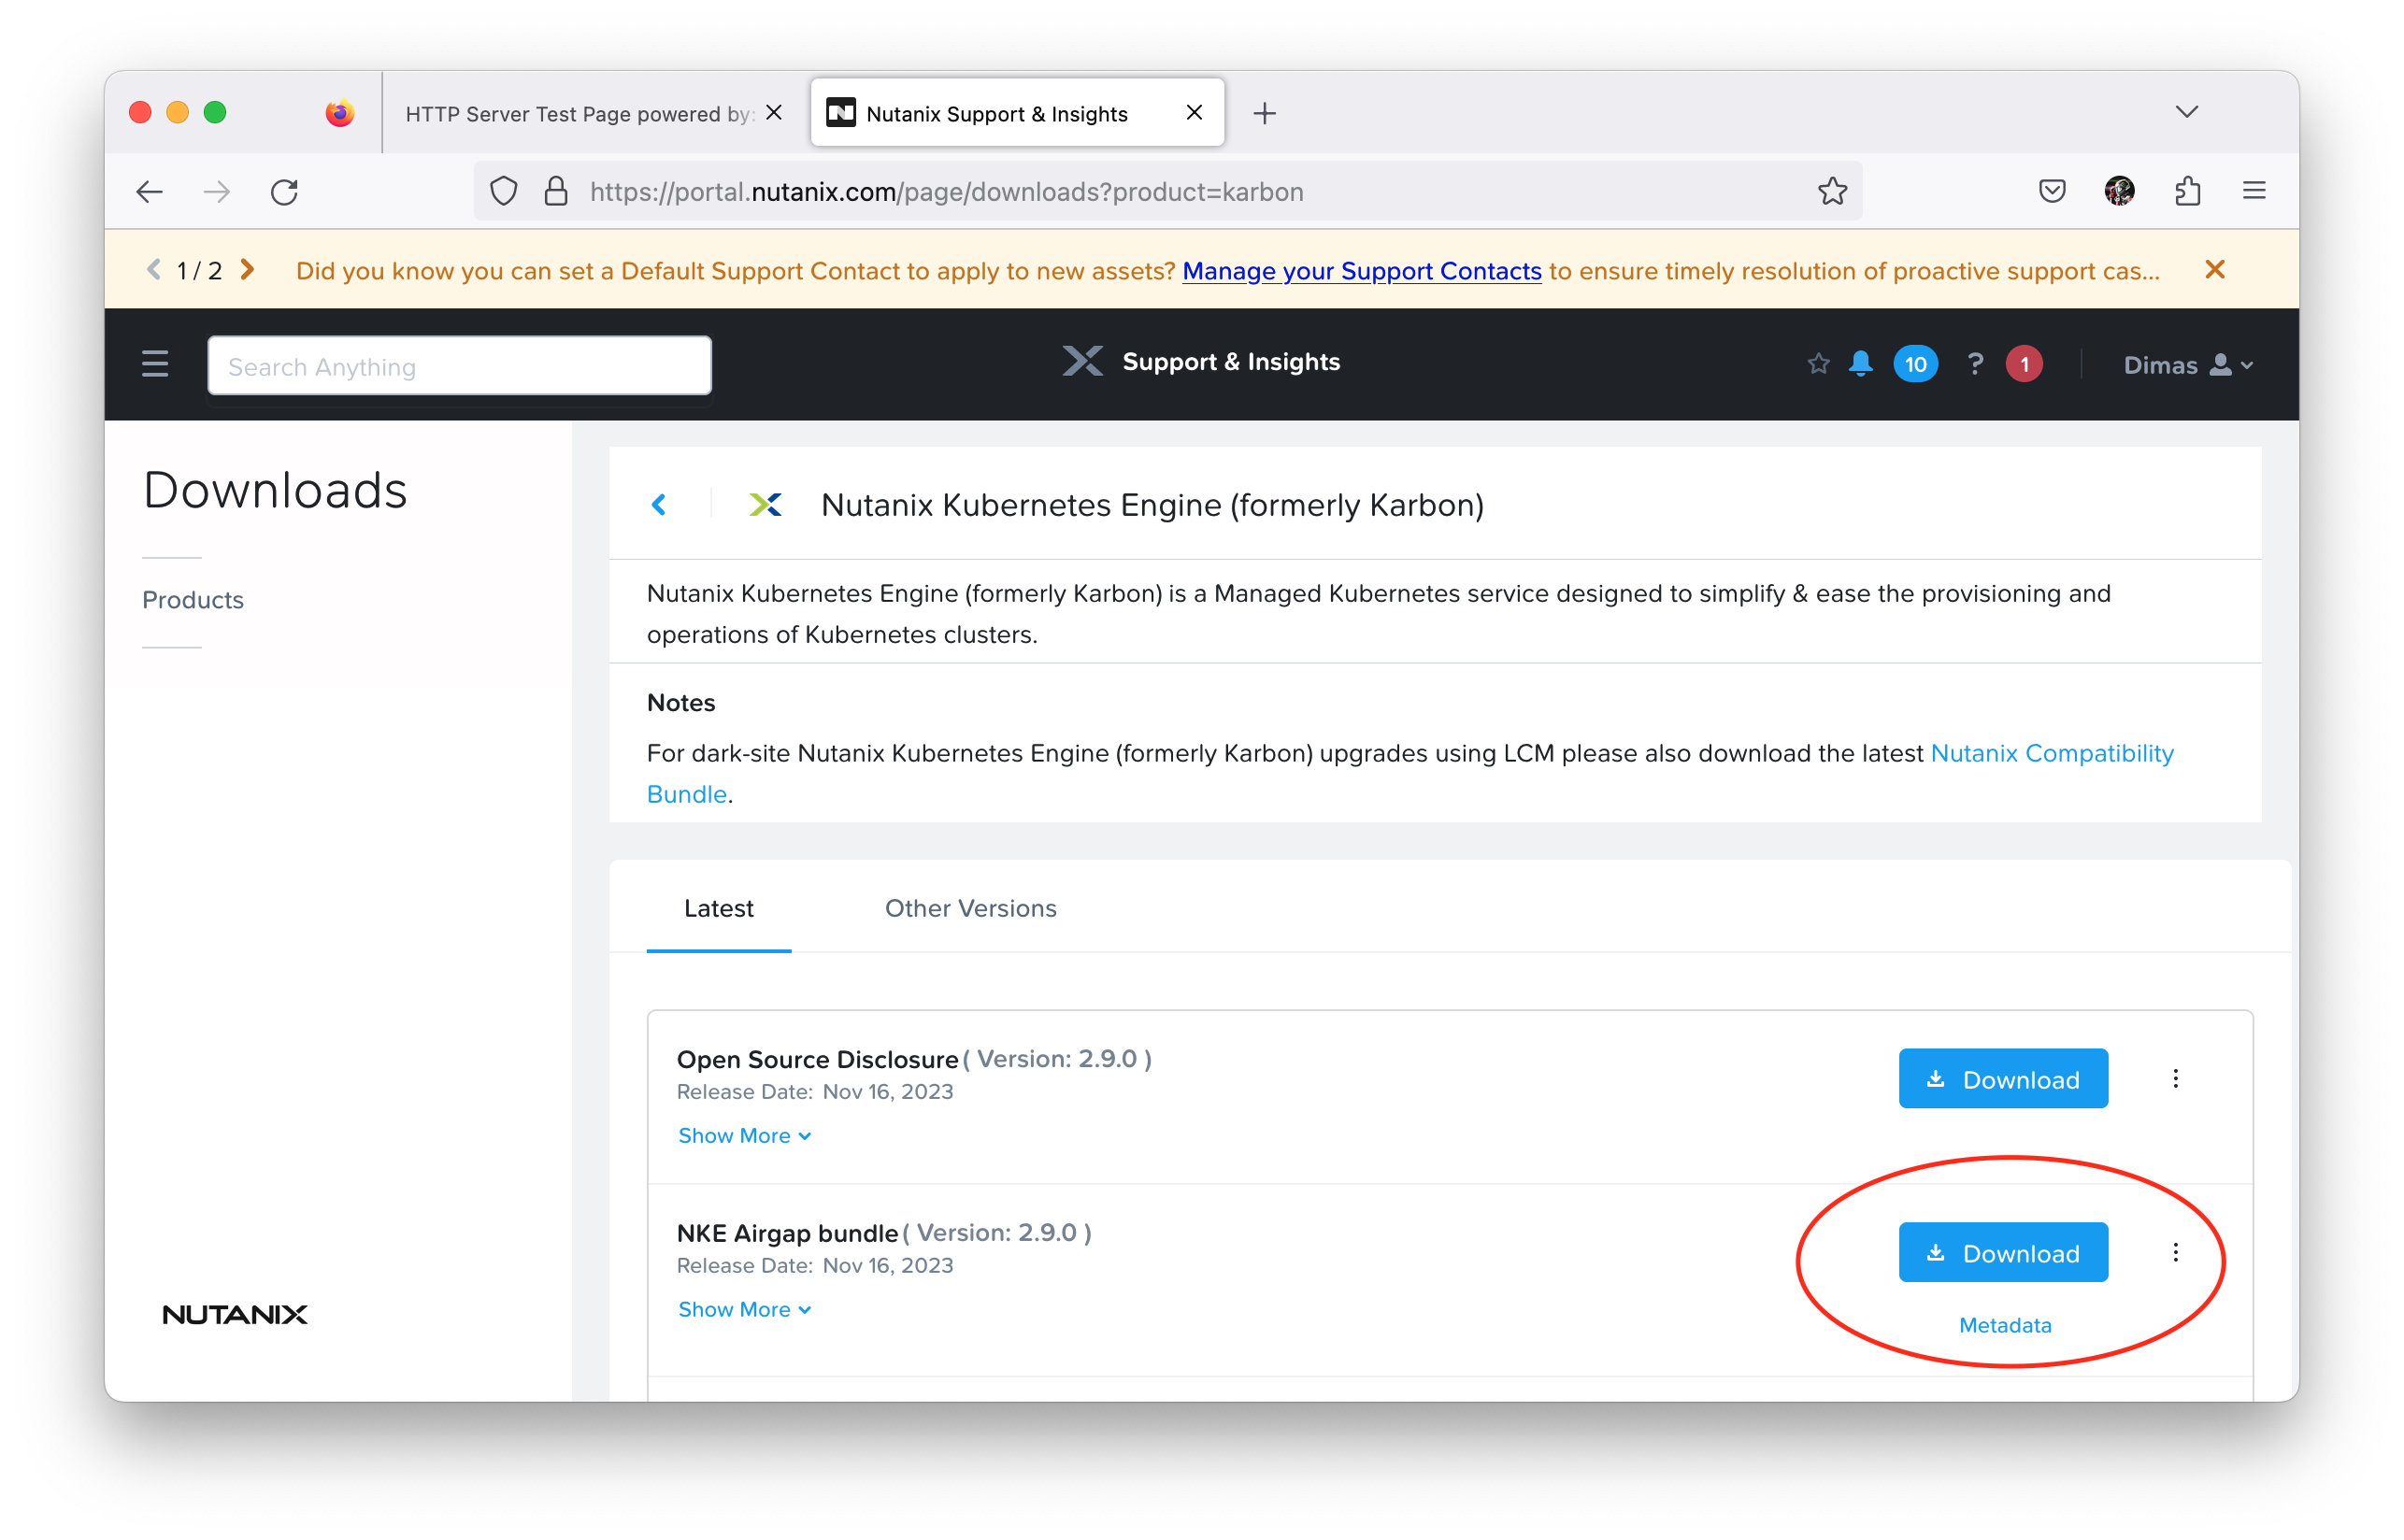
Download binary airgap from nutanix portal support
Setelah kita download package airgap-ntnx-x.x.x.tgz selanjutnya kita upload ke web server tersebut dengan menggunakan perintah:
scp downloads/airgap-ntnx-x.x.x.tgz root@10.12.11.60:~/
scp downloads/airgap-manifest.json root@10.12.11.60:~/
Kemudian kita login ke extract menggunakan perintah:
export AIRGAP_VERSION=2.8.0
## create folder and give it access to write
sudo mkdir -p /var/www/html/release/nke/ && \
sudo chmod -R 777 /var/www/html/**

## extrat to folder target
tar xvf airgap-ntnx-$AIRGAP_VERSION.tar.gz -C /var/www/html/release/nke/
cp airgap-manifest.json /var/www/html/release/nke/
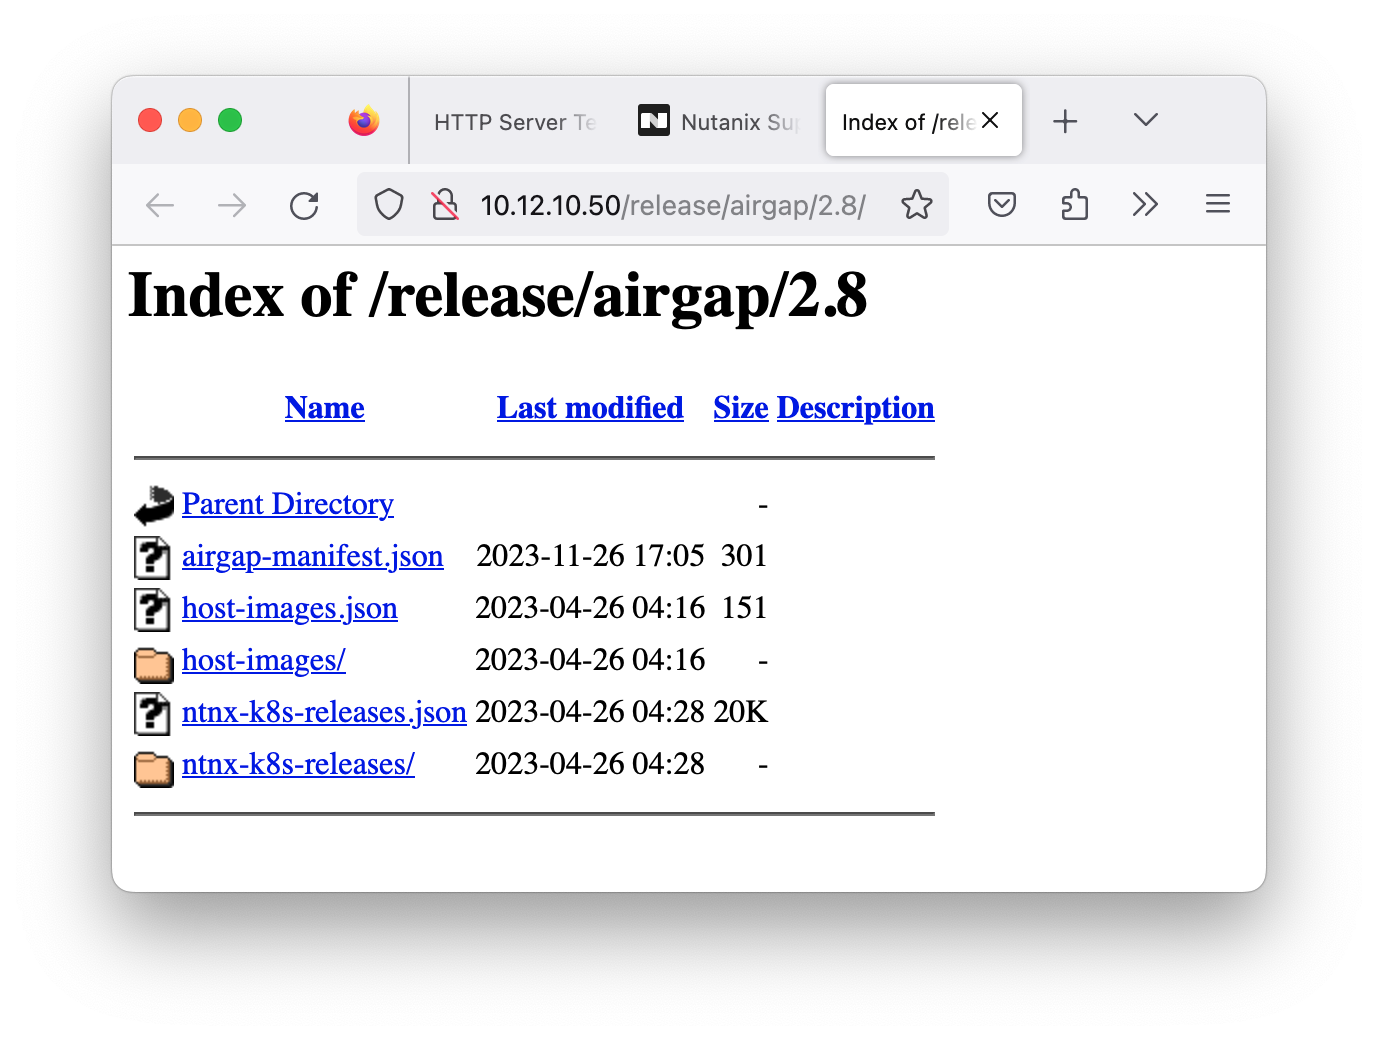
Sekarang kita bisa akses webappnya dengan url berikut http://10.12.11.60/release/nke/
Maka outputnya seperti berikut:
Deploying airgap
Untuk mendeploy airgap, kita perlu login menggunakan ssh ke Prism Central mengunakan user nutanix seperti berikut:
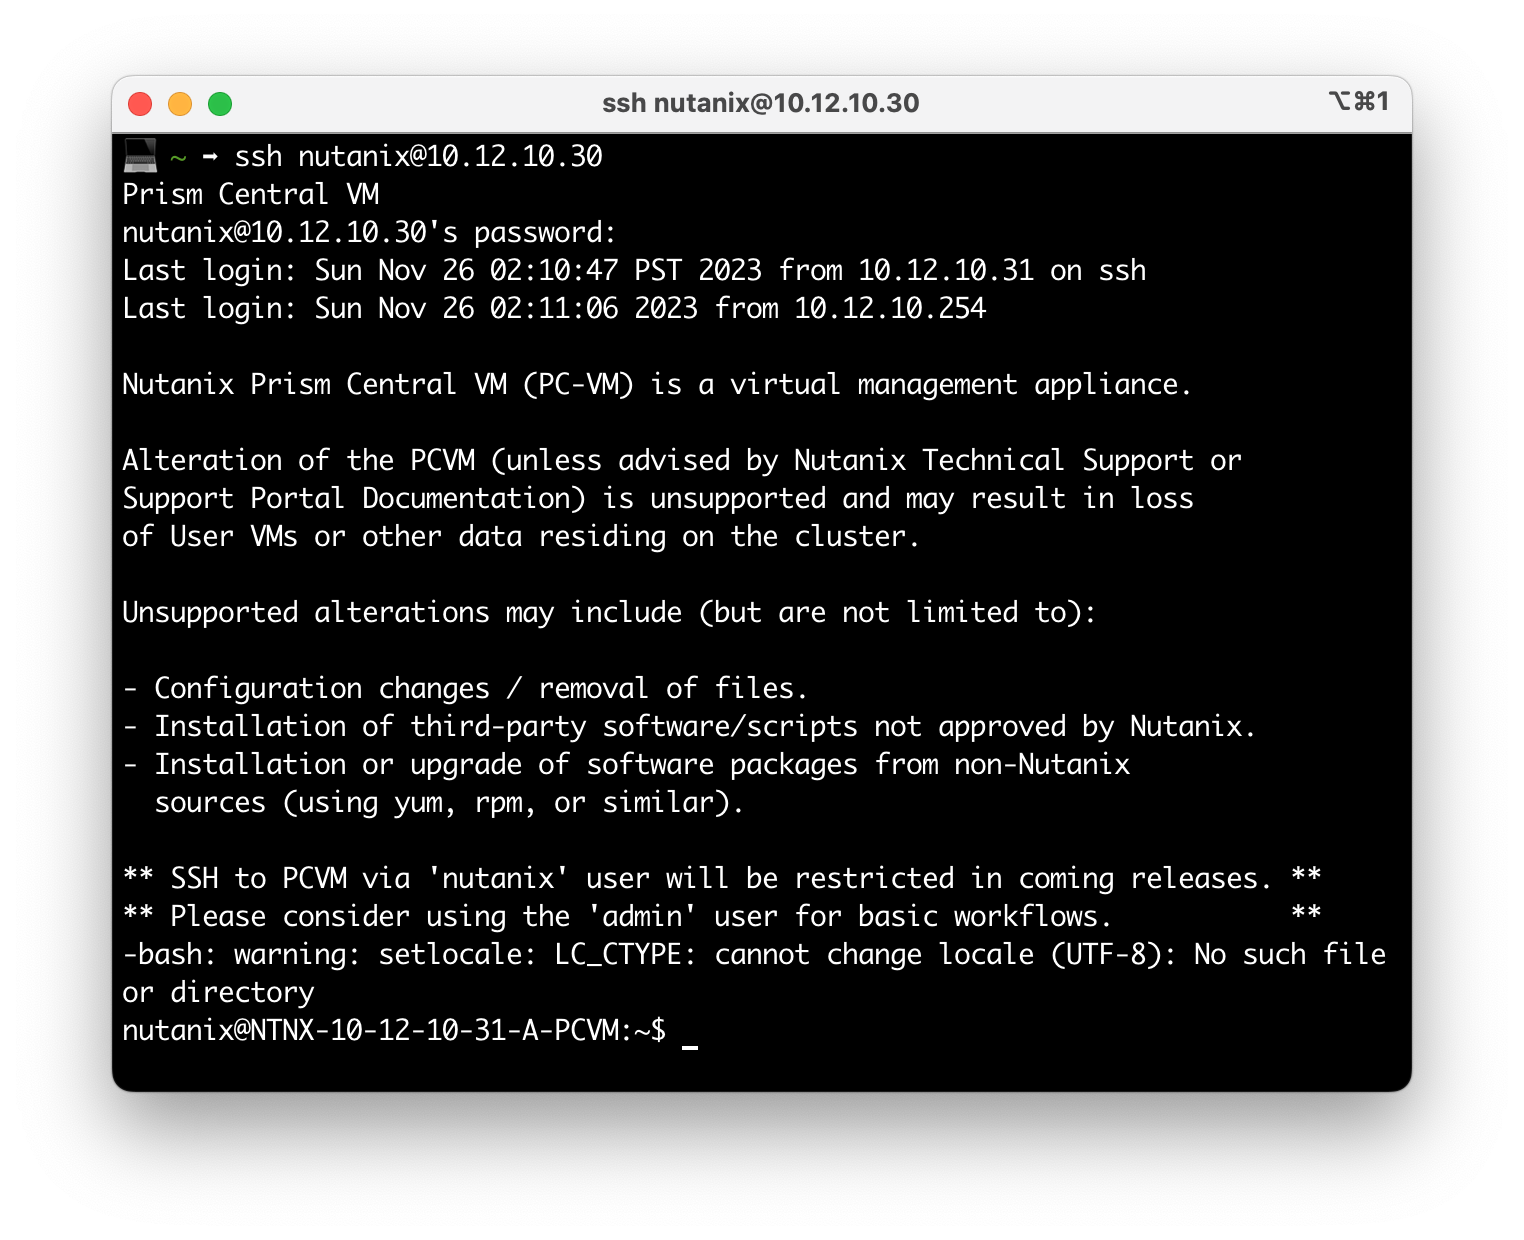
Kemudian kita menggunakan tools karbonctl yang terletak di folder karbon
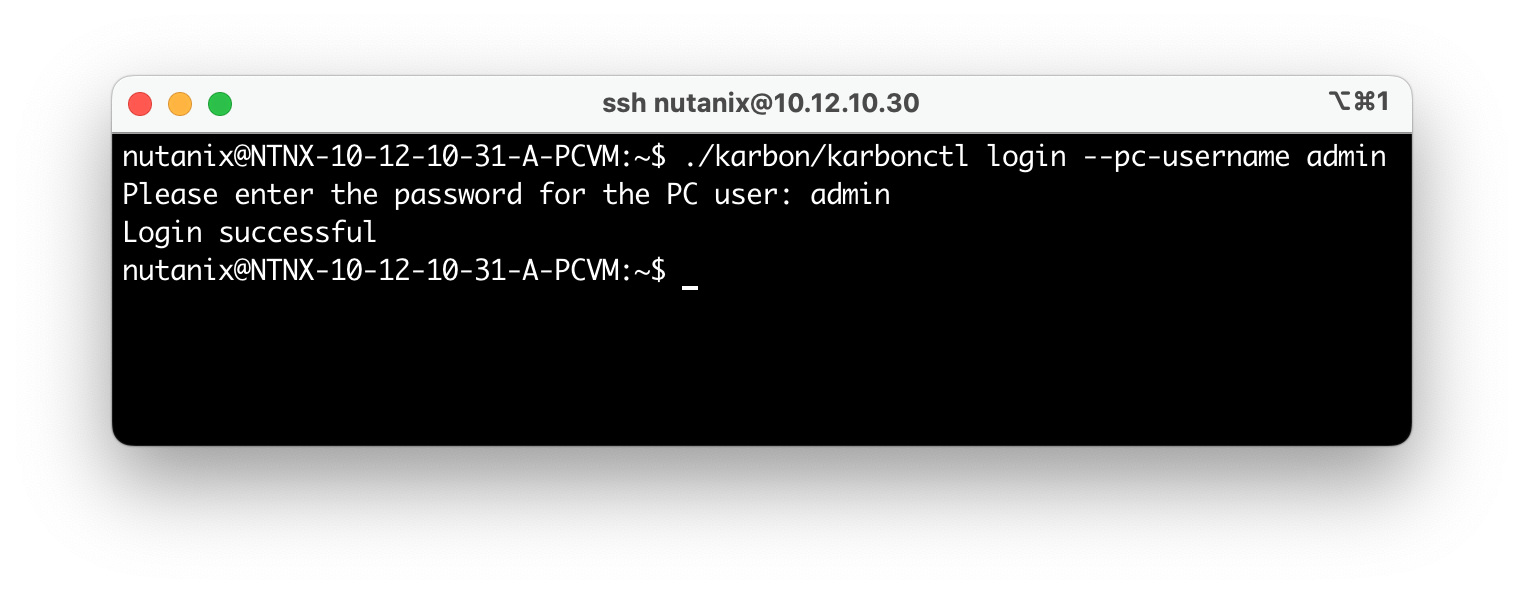
Pertama kita login dulu menggunakan perintah:
./karbon/karbonctl login --pc-username admin
Input password untuk user admin pada Web Prism Central, jika berhasil outputnya seperti berikut:
Setelah itu kita siapkan dulu pre-requisites untuk deploy airgap seperti berikut:
- Networking:
--vlan-nameatau--vlan-uuidbisa diambil dari Prism Element di menu Setting -> Network Configuration seperti berikut:
--static-ipkita bisa tentukan ip untuk vm airgapnya mau dipasang brapa?
- Cluster:
--pe-cluster-nameatau--pe-cluster-uuidbisa ambil di Prism Element pada menu Setting -> Cluster Detail seperti berikut: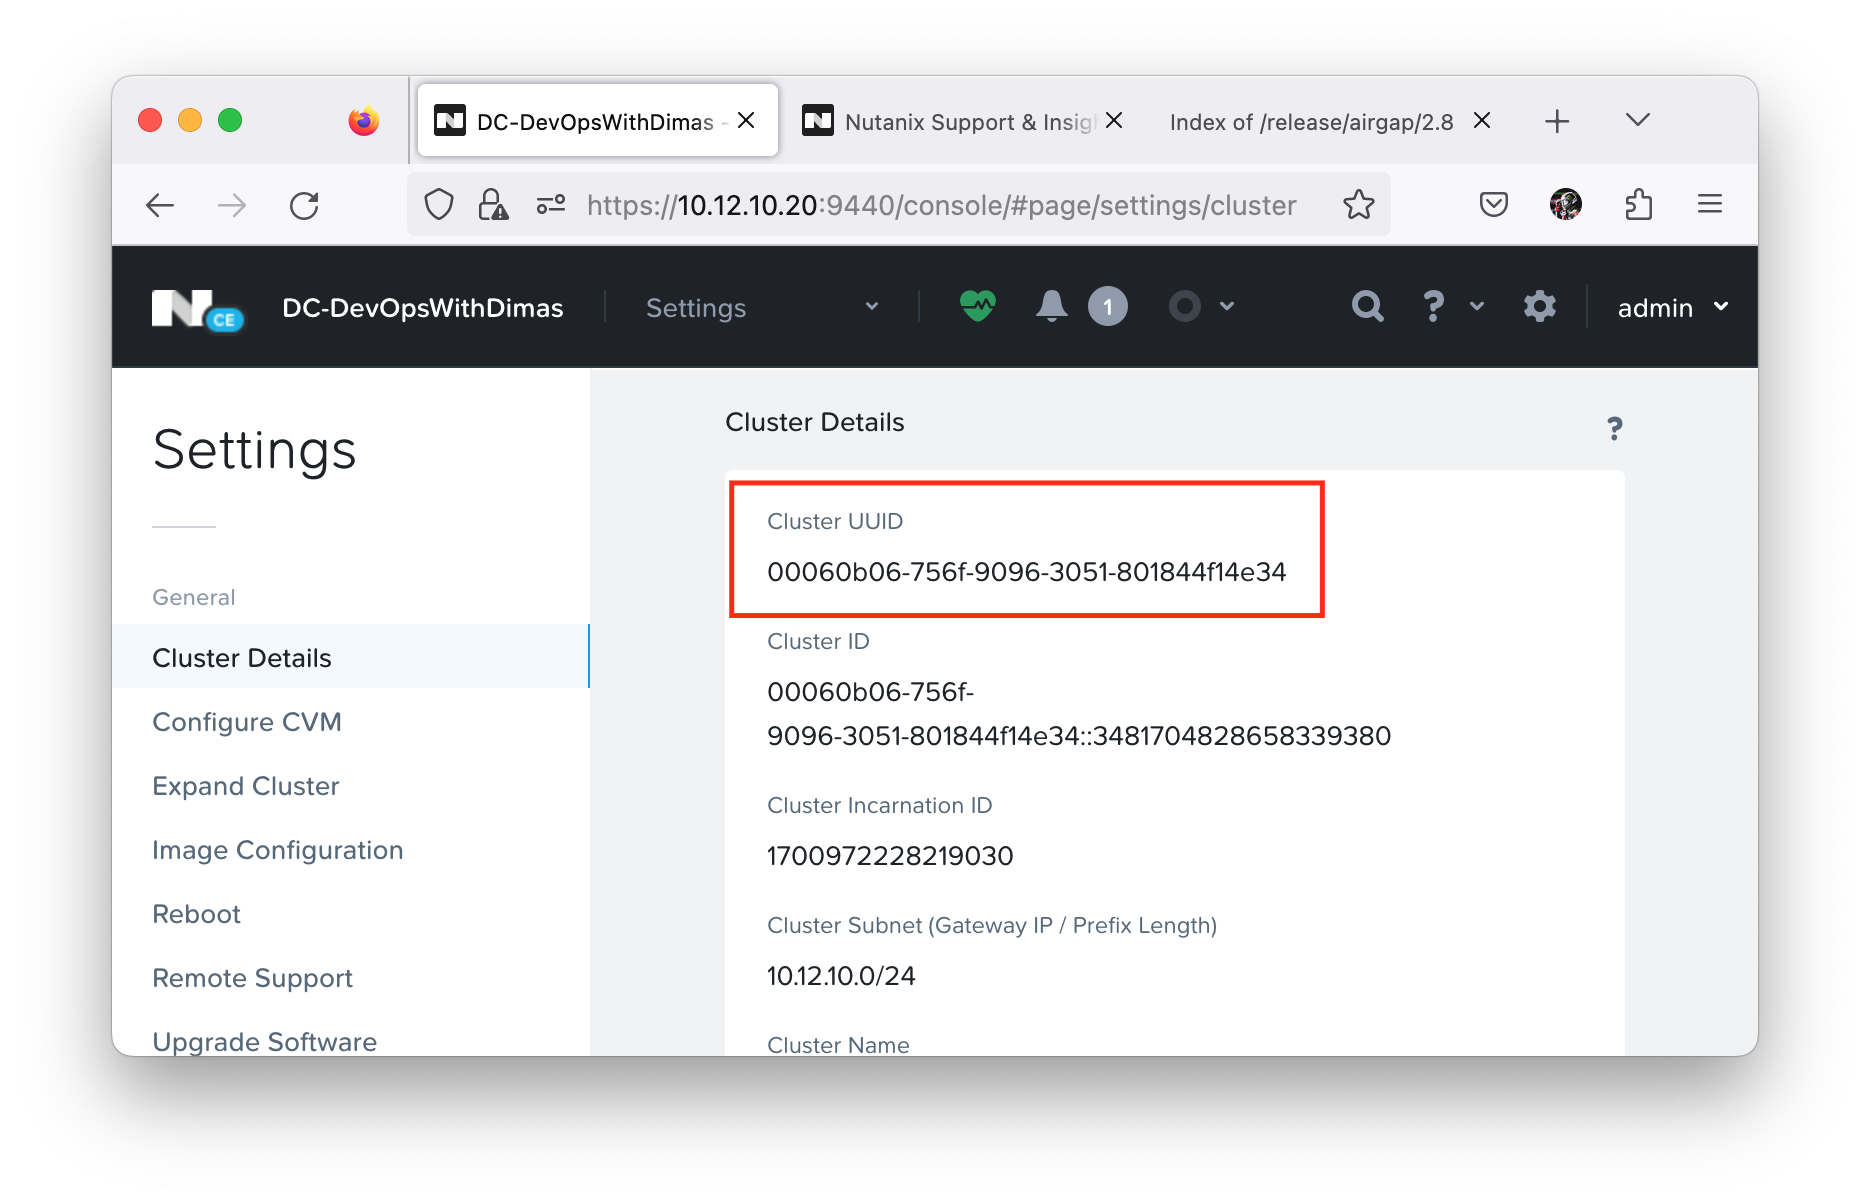
- Storage:
--storage-containerbisa ambil dari Prism Element pada menu -> Storage -> Storage Container seperti berikut: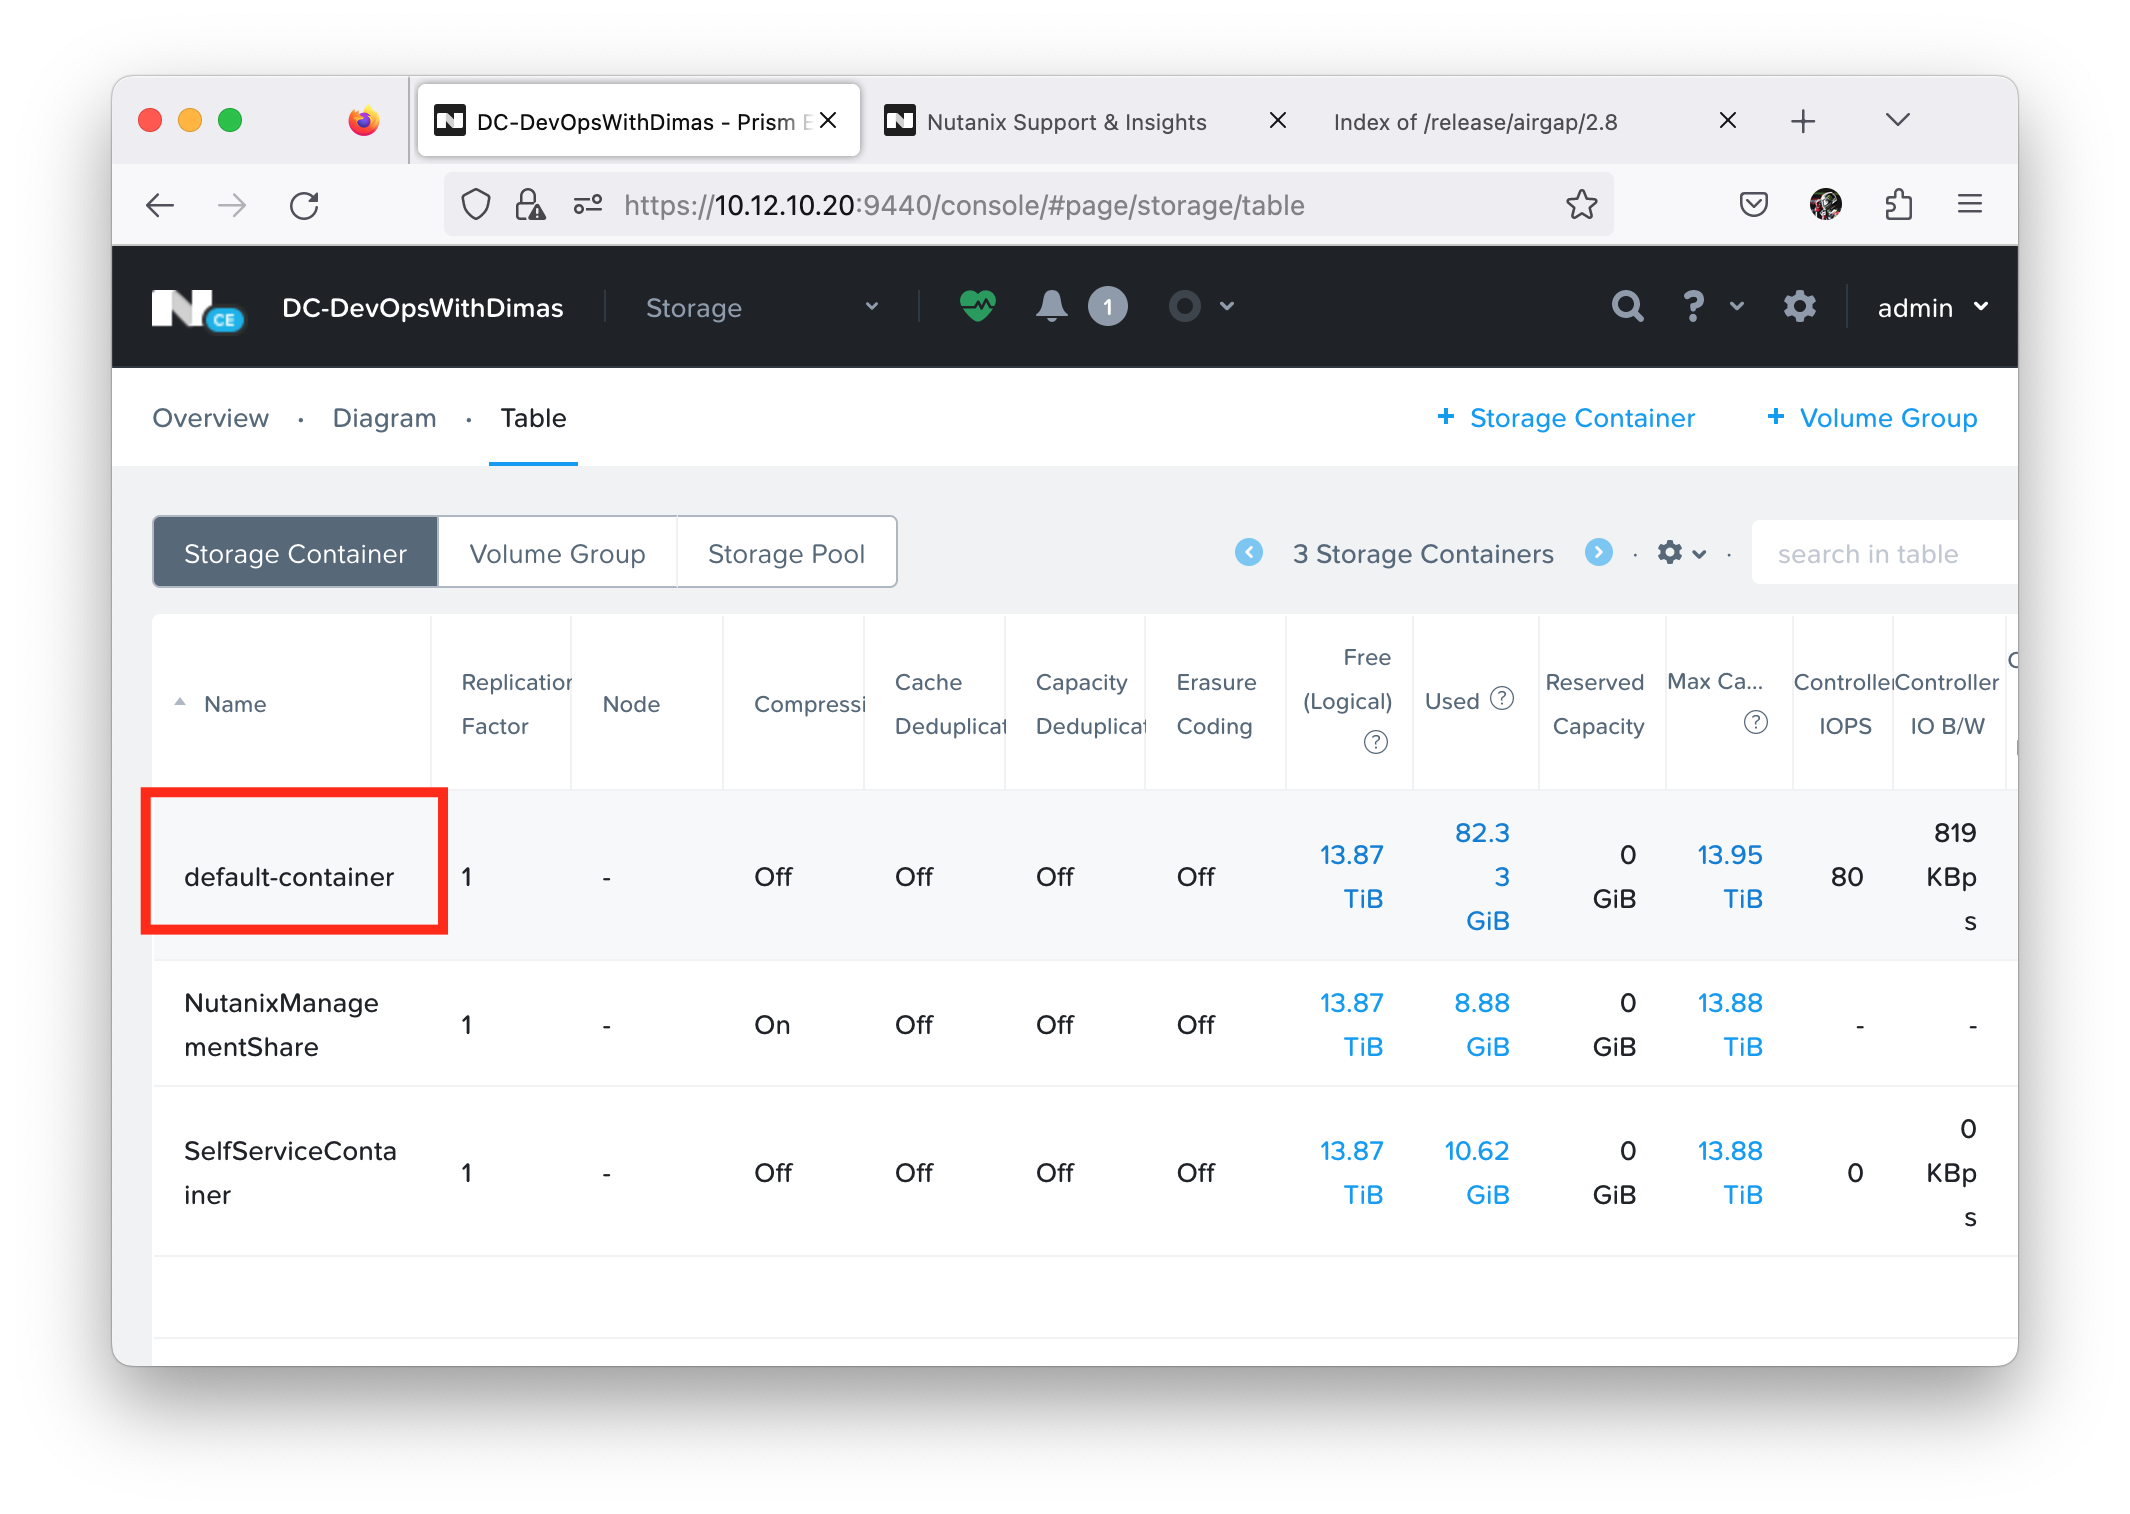
- Darksite config:
--webserver-urlkita arahkan ke webserver yang udah kita siapkan sebelumnya
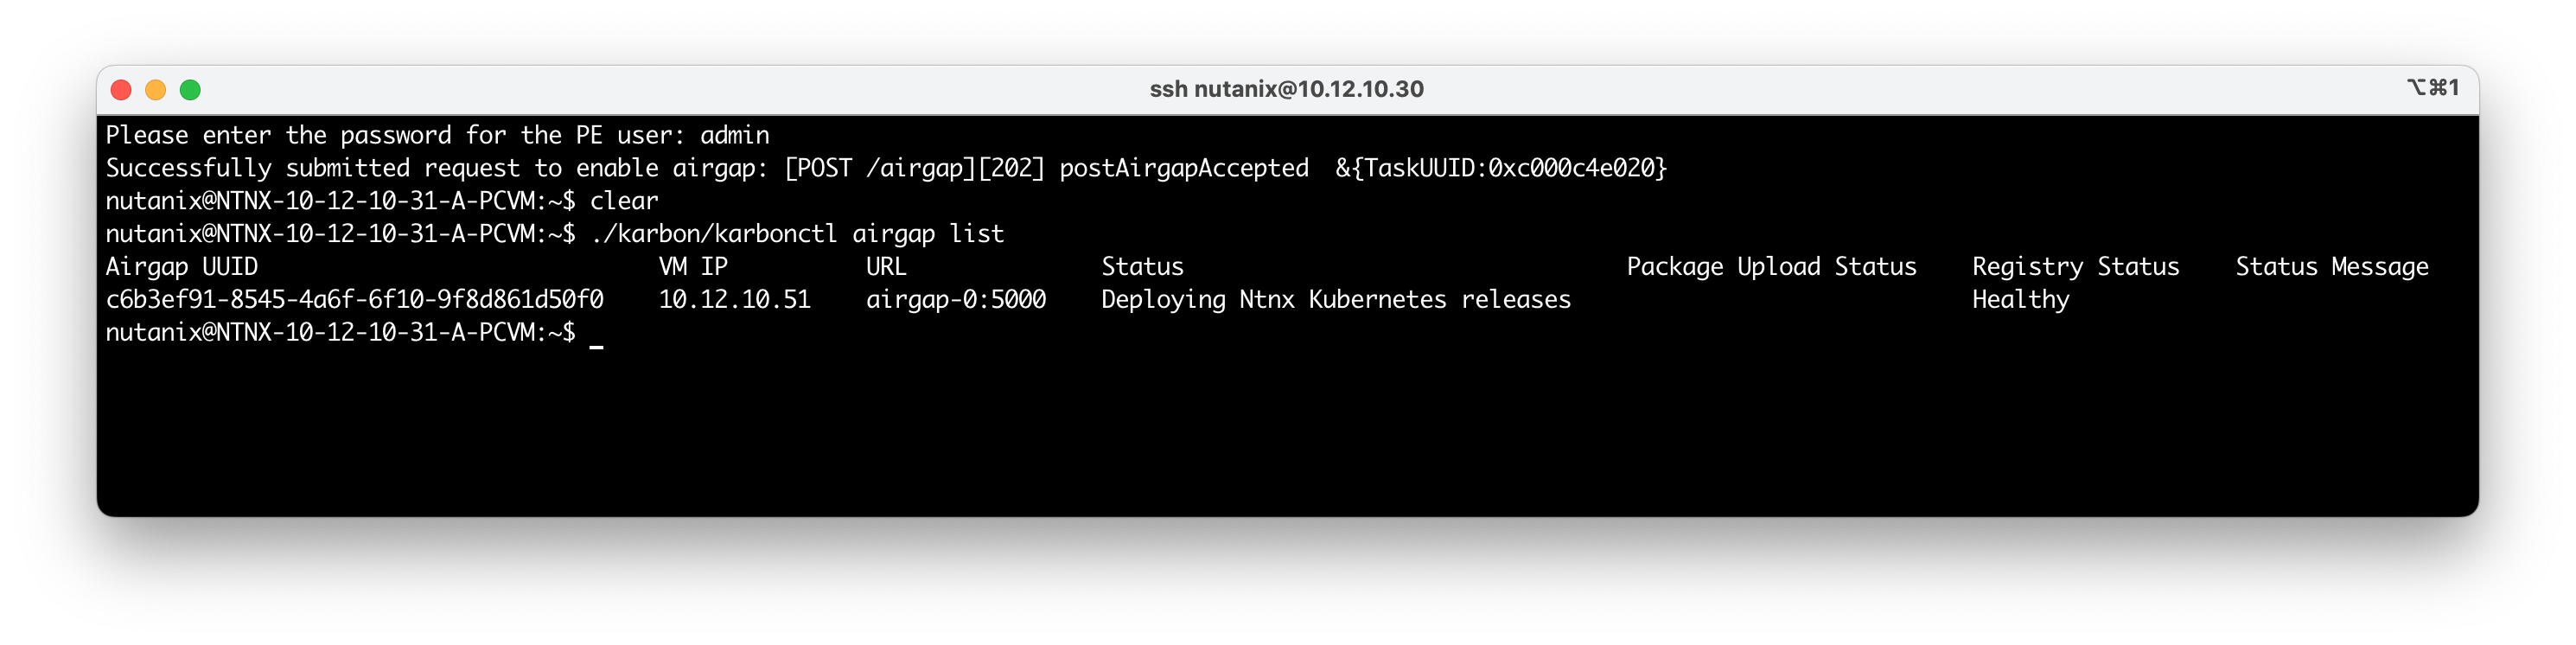
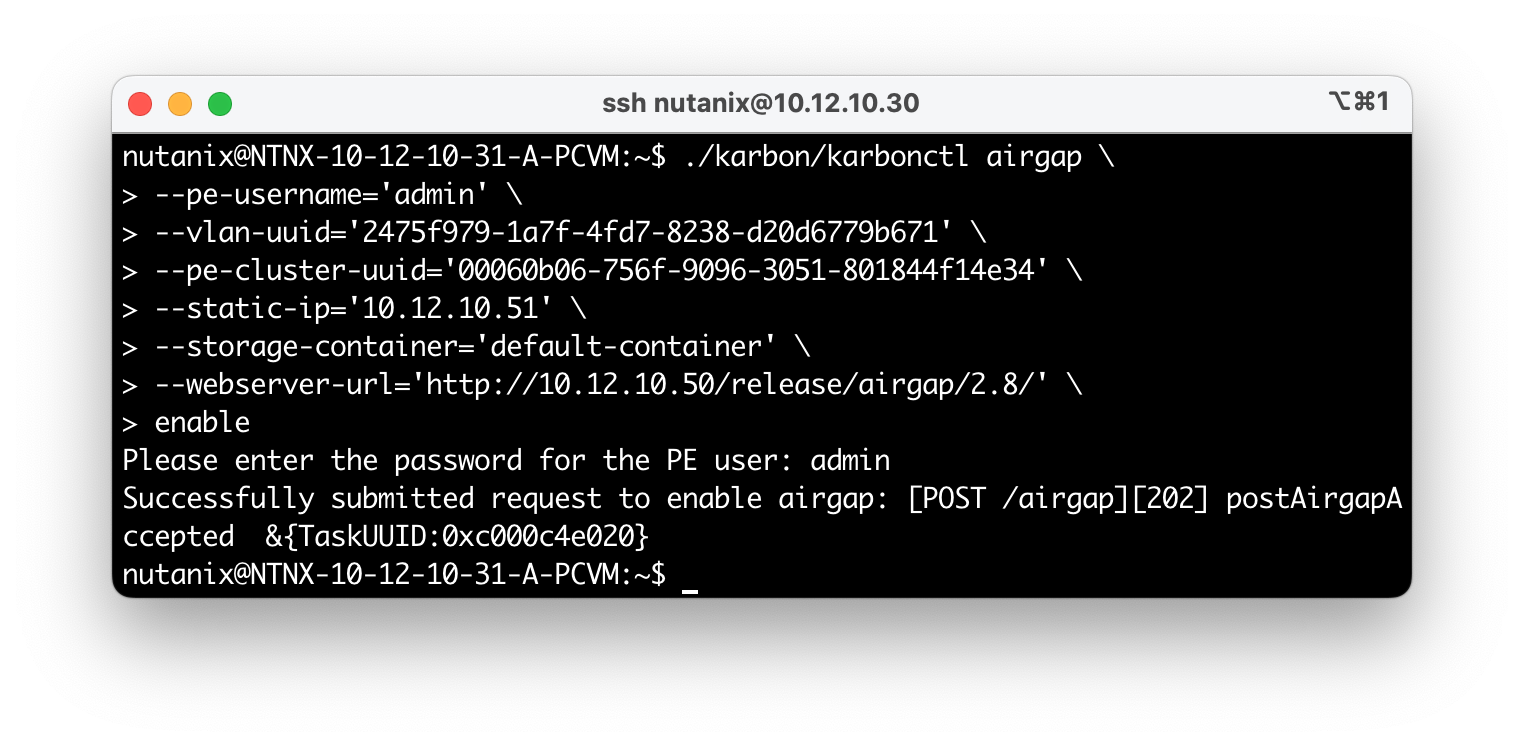
Ok pre-requisite sudah terpenuhi semua sekarang kita enable airgap dengan perintah berikut:
./karbon/karbonctl airgap \
--pe-username='admin' \
--vlan-uuid='<network-vlan-uuid>' \
--pe-cluster-uuid='<prism-cluster-uuid>' \
--static-ip='10.12.11.61' \
--storage-container='default-container' \
--webserver-url='http://10.12.11.60/release/nke/' \
enable
Maka hasilnya seperti berikut:
Kemudian kita bisa check airgapnya sudah di success terdeploy dengan perintah berikut:
./karbon/karbonctl airgap list
Maka hasilnya seperti berikut: